
Motorola introduced the Moto G Stylus model in 2020 with some unique stylus features. Since then, Motorola has added two new models each year in the Moto G Stylus series: the 4G model, which is close to the base mode of Moto G, and the 5G mode, which is usually more powerful with higher specs and close to the Moto G Power (see Moto G naming conventions).
Many Moto G owners are not sure whether they need the stylus features. And some Moto G Stylus owners are aware of some of the stylus features.
This Moto G how-to guide explains the stylus features on all Moto G Stylus models, including the capacitive stylus, stylus menu (stylus shortcut), writing text in apps, Moto Note, Coloring book, taking a screenshot and editing, live messages (2021), creating GIFs from screen recording (2022), and handwriting calculator (2023).
Detailed usage of individual stylus features is covered in individual Moto G how-to guides.
A capacitive stylus: the stylus in Moto G Stylus is not an active pen
The stylus equipped with Moto G Stylus (all models, all generations) is a capacitive stylus, which is notably different from the active pens (e.g., S Pen) found in Galaxy Note devices and Galaxy S22, S23, and S24 Ultra devices. Unlike active pens, which typically feature pressure sensitivity, wireless connectivity, and various buttons for additional functionalities, the stylus included with the Moto G Stylus is a passive tool.
However, the Moto G Stylus has a finer tip than most capacitive styluses on the market, so you can get relatively precise control of the screen. Sometimes, it is more convenient than using fingers (e.g., selecting text to copy).
Moto G Stylus can also detect the stylus when it is removed or inserted. So, the phone can offer some advanced stylus features that used to be exclusive to active pens. For example, by default, when you remove the stylus from the slot, the stylus menu will be available.
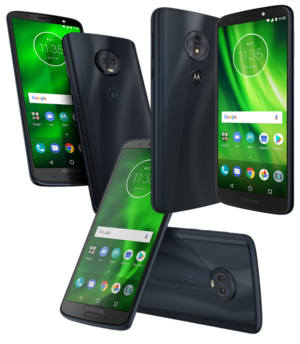
The stylus features on all Moto G Stylus are almost identical. The stylus can be used on any Moto G Stylus phone. But the dimensions of the stylus change each year. So, you can use the stylus for Moto G stylus 2022 on Moto G Stylus 2023, for example. But you cannot insert it into Moto G Stylus 2023.
As a stylus with a fine tip requires a digitizer that … Read the rest


 Update: if you want to make both SIM cards available at all times in dual SIM version of Moto G (all Moto G generations) so that you will not miss any calls (even when you are talking over one SIM card) , you may follow
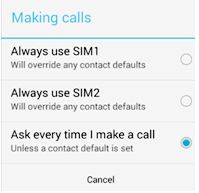 By default, when you dial a number, you will be asked for the SIM card to be used for that call. This is useful if you want to use different SIM cards for different numbers, and you need switch them frequently.
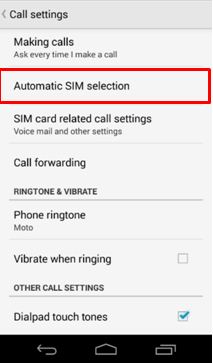 Moto G also has a nice feature in dual SIM cards models for those who have to switch between SIM cards for outgoing …